by

Creating Apple Wallet Passes in Batch With MakePass and Shortcuts

EN

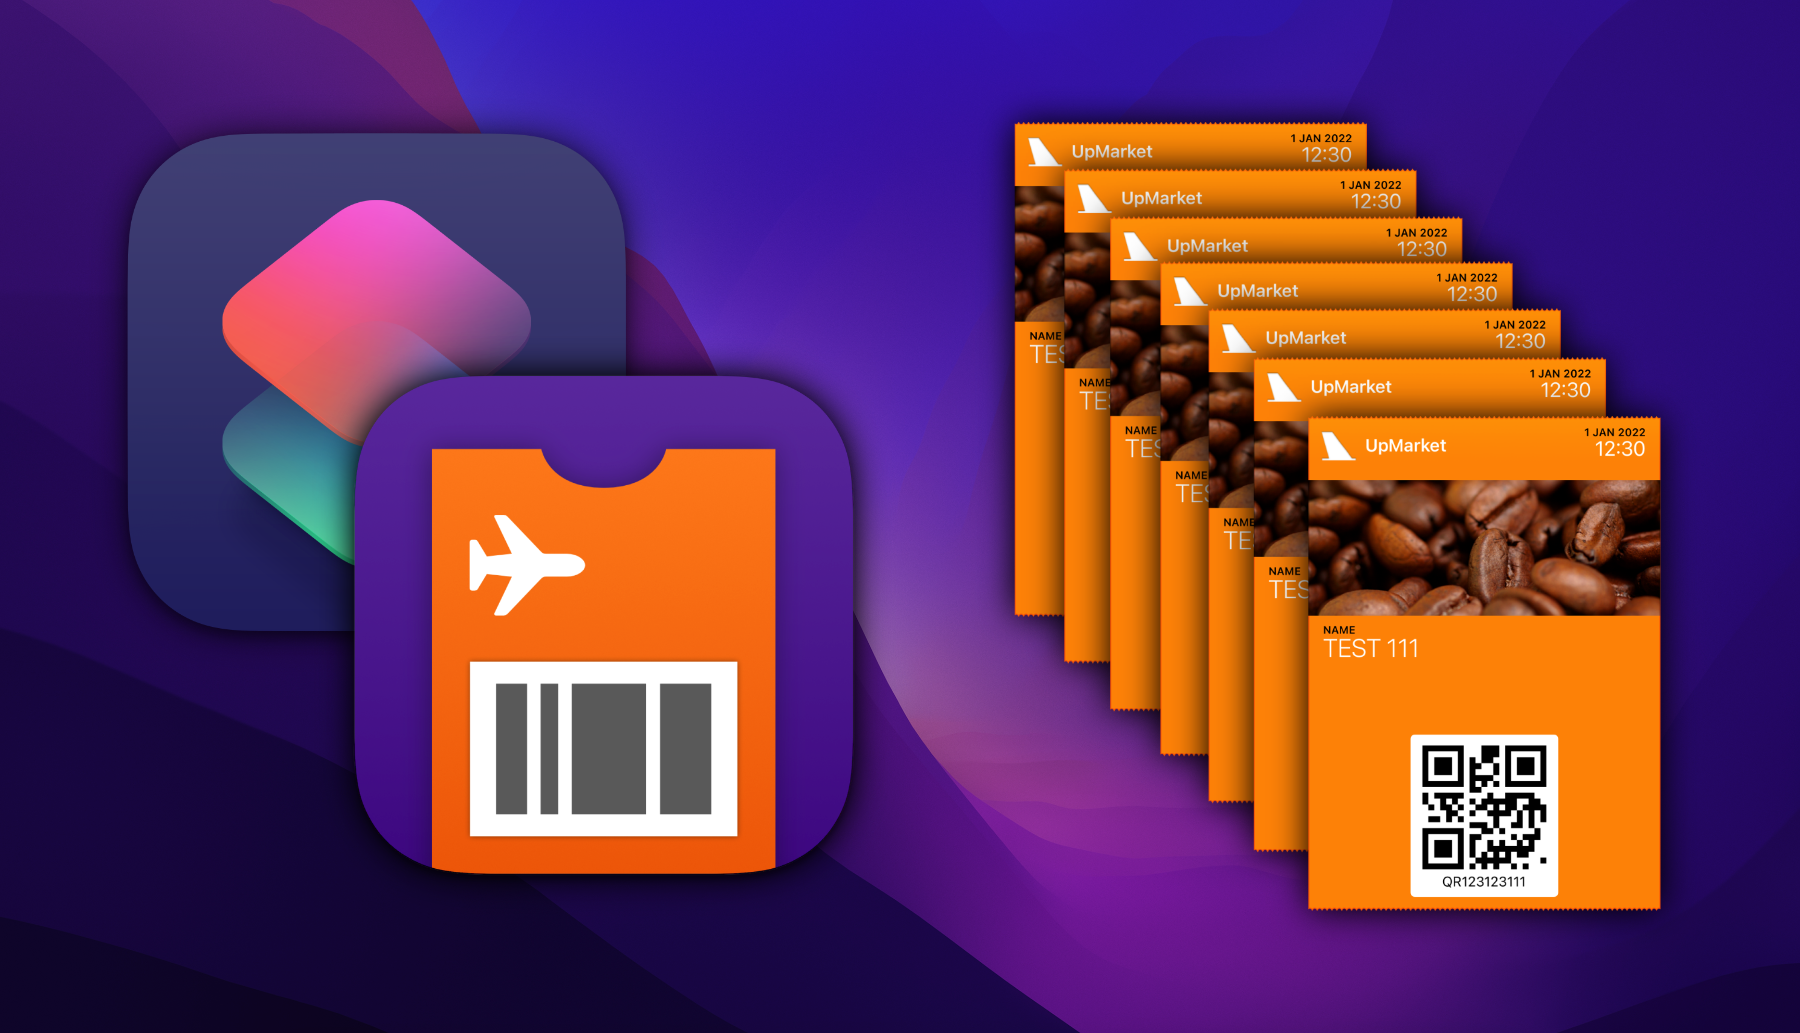
"MakePass – Pass Batch"

TL;DR

You can download a shortcut here that parses a CSV text and generates multiple passes in batch using MakePass:

Introduction

MakePass is a mighty Apple Wallet pass editor, with it you can create and customize a myriad of passes with complex layouts including images, barcodes, colors and text fields, but its the most powerful and versatile feature is its integration with the Shortcuts app in iOS, iPad and macOS.

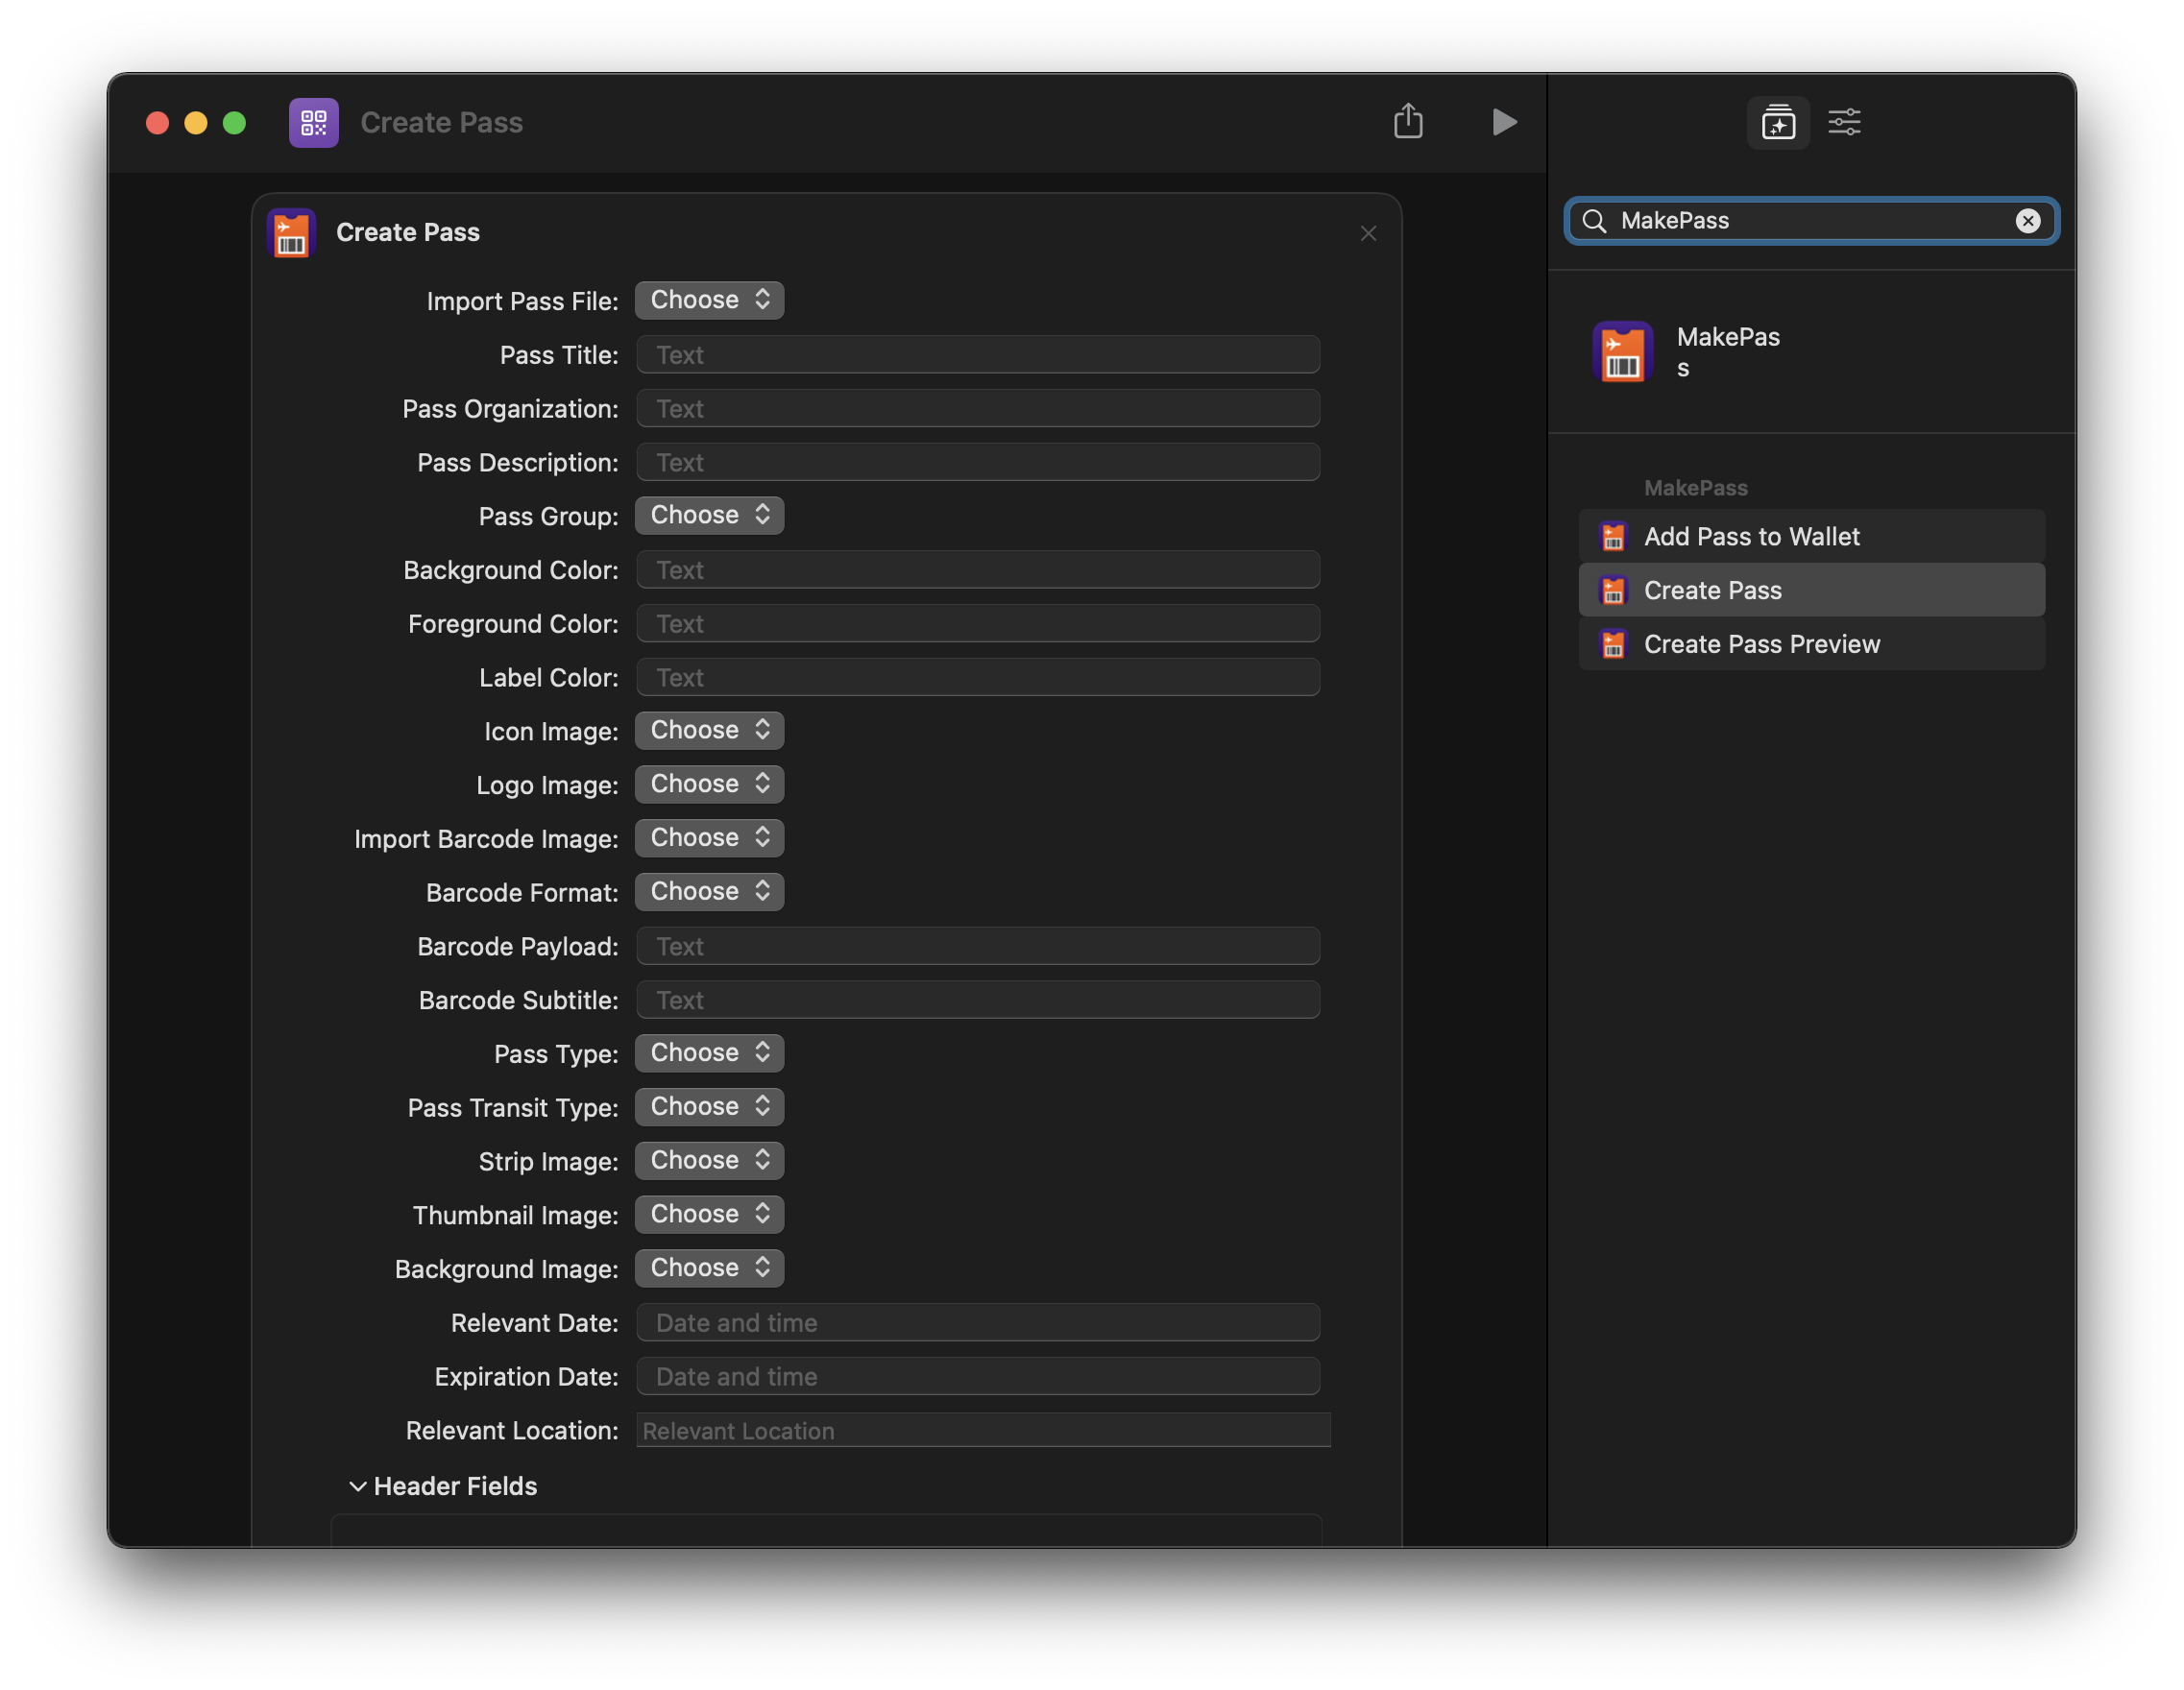
"MakePass – “Create Pass” Action"

MakePass includes multiple Shortcuts actions that allow you to create, preview and share Apple Wallet passes. The Create Pass action exposes all the power of the MakePass pass editor directly in Shortcuts so you can customize all the properties of your pass. The Create Pass action includes an Import Pass File parameter so you can import a template pass file whose properties can be overridden by the action parameters.

Process

First you should create a pass file which will be used as a template. This template file will be set in the Import Pass File parameter of the Create Pass action which uses it as the base canvas over which to override any other parameter. If you do not import a pass file, the Create Pass action will use a blank template by default. You can create your own pass template file in MakePass or use this one as an example.

Afterwards, to create multiple Apple Wallet passes in batch you should import the information which will be inserted in the pass template for each new pass. To do so, we can use the popular CSV (comma-separated values) format:

John Appleseed,CD-0000001,2021-01-01 12:00
Chandler Bing,CD-0000002,2021-01-02 12:00
Mario Gómez,CD-0000003,2021-01-03 12:00
Ursula von Köriet,CD-0000004,2021-01-04 12:00
Alejandro Couñago,CD-0000005,2021-01-05 12:00

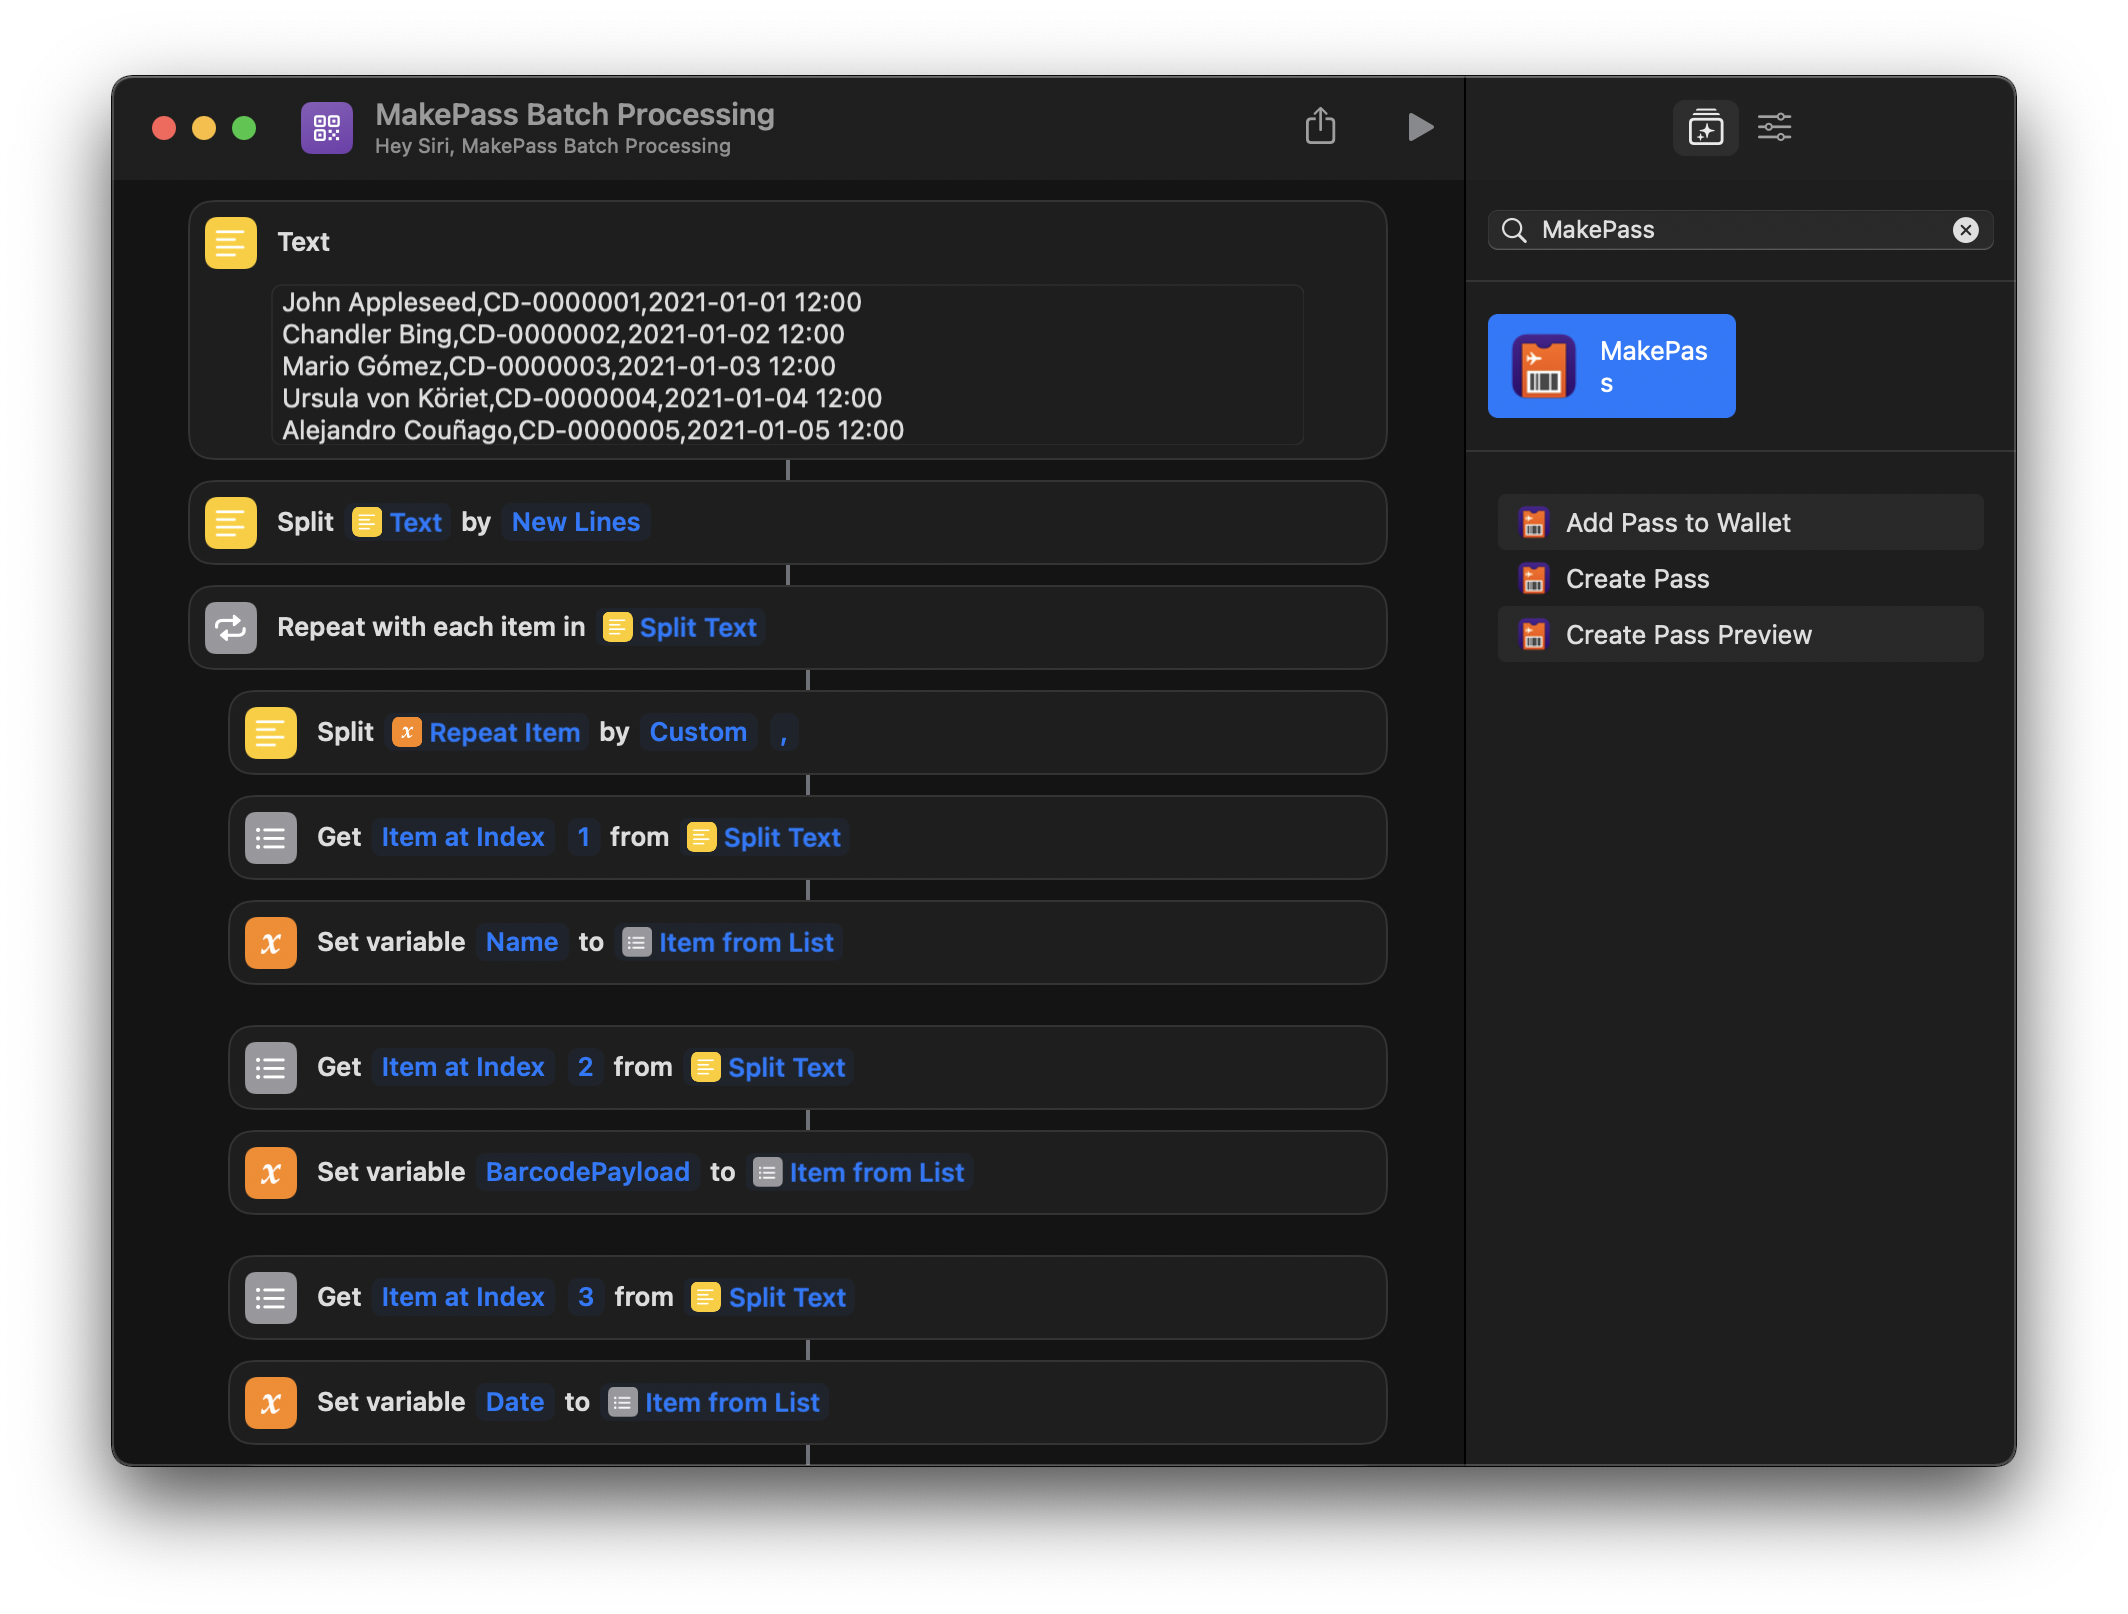
In this example CSV document, each line represent a pass which will be generated. Each line includes 3 components which will be added to the pass template (a name in a text field like "John Appleseed", a QR barcode payload like "CD-0000001" and a relevant date like "2021-01-01 12:00"). To load this CSV in Shortcuts we can use the Text action, load the contents from a file or use the shortcut content input. In this example we will use the Text action.

Once we have the CSV text loaded in the shortcut, we can split it by line and iterate over them. In each iteration we can split the line by commas and we can extract each of the pass components needed to fill the pass template:

"MakePass – Batch Shortcut – 1"

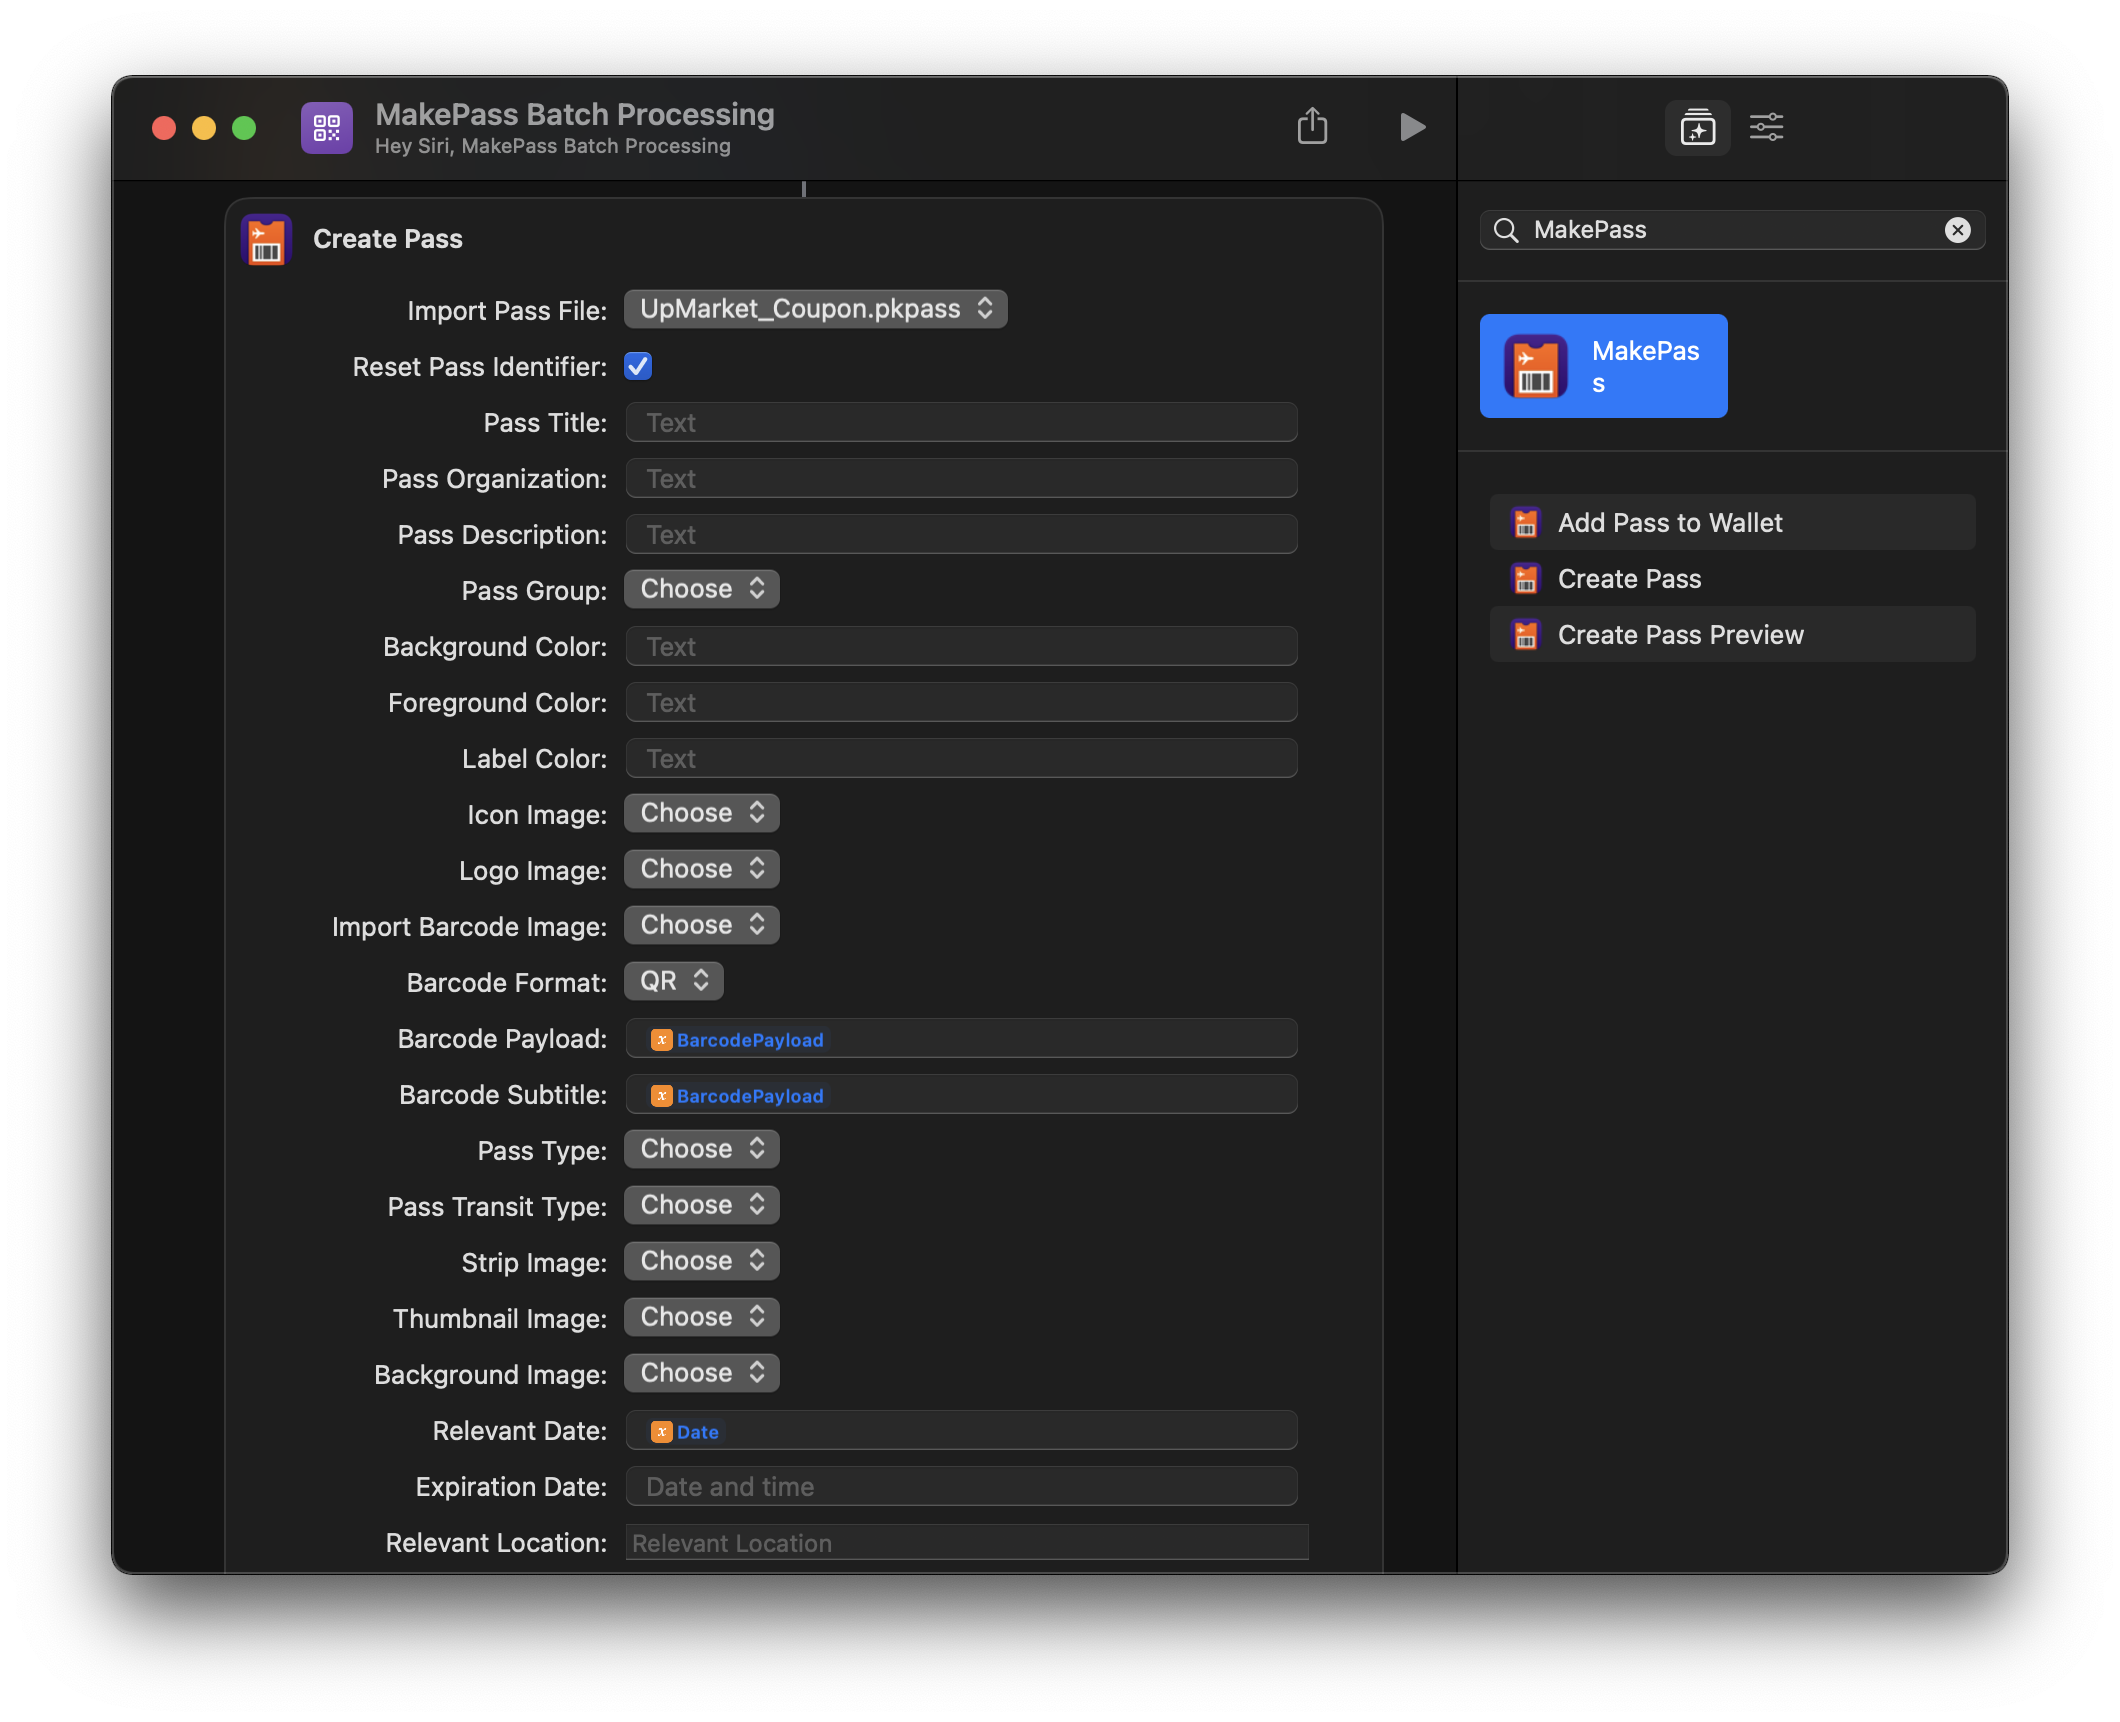
After extracting the components we can simply set our pass template file in the Import Pass File parameter and fill the other custom parameters in the Create Pass action to complete the template:

"MakePass – Batch Shortcut – 2"

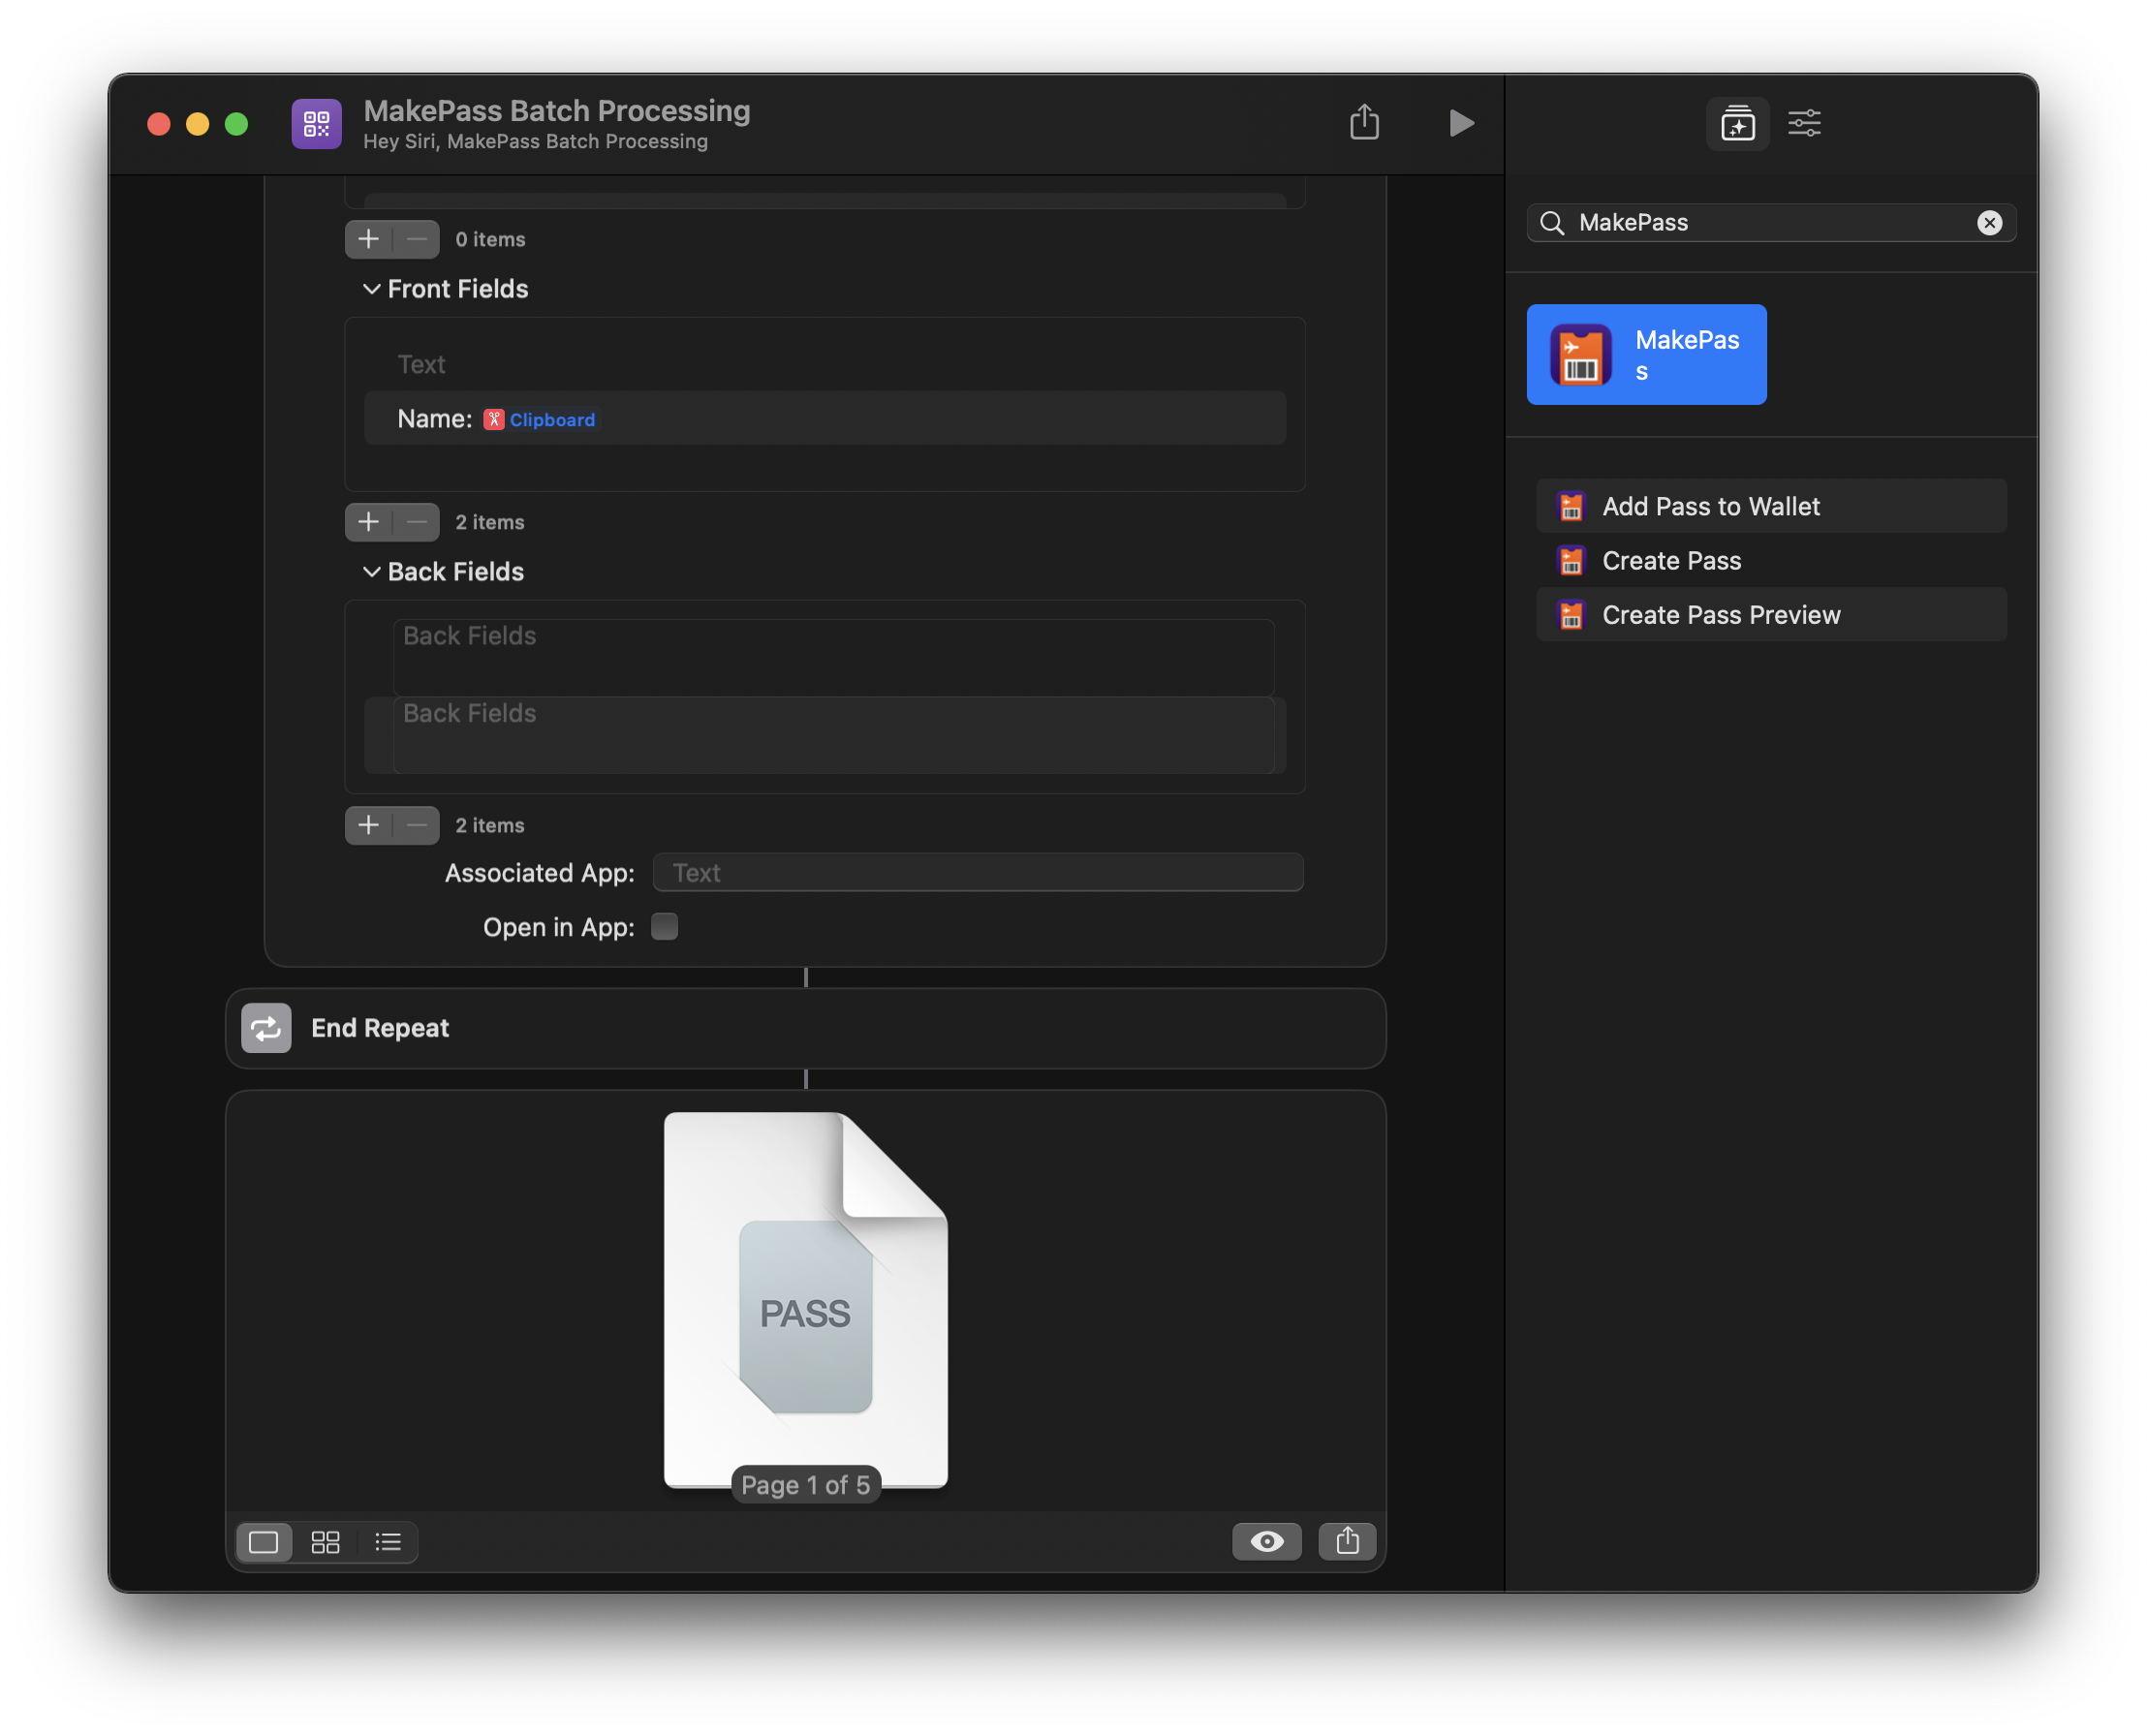
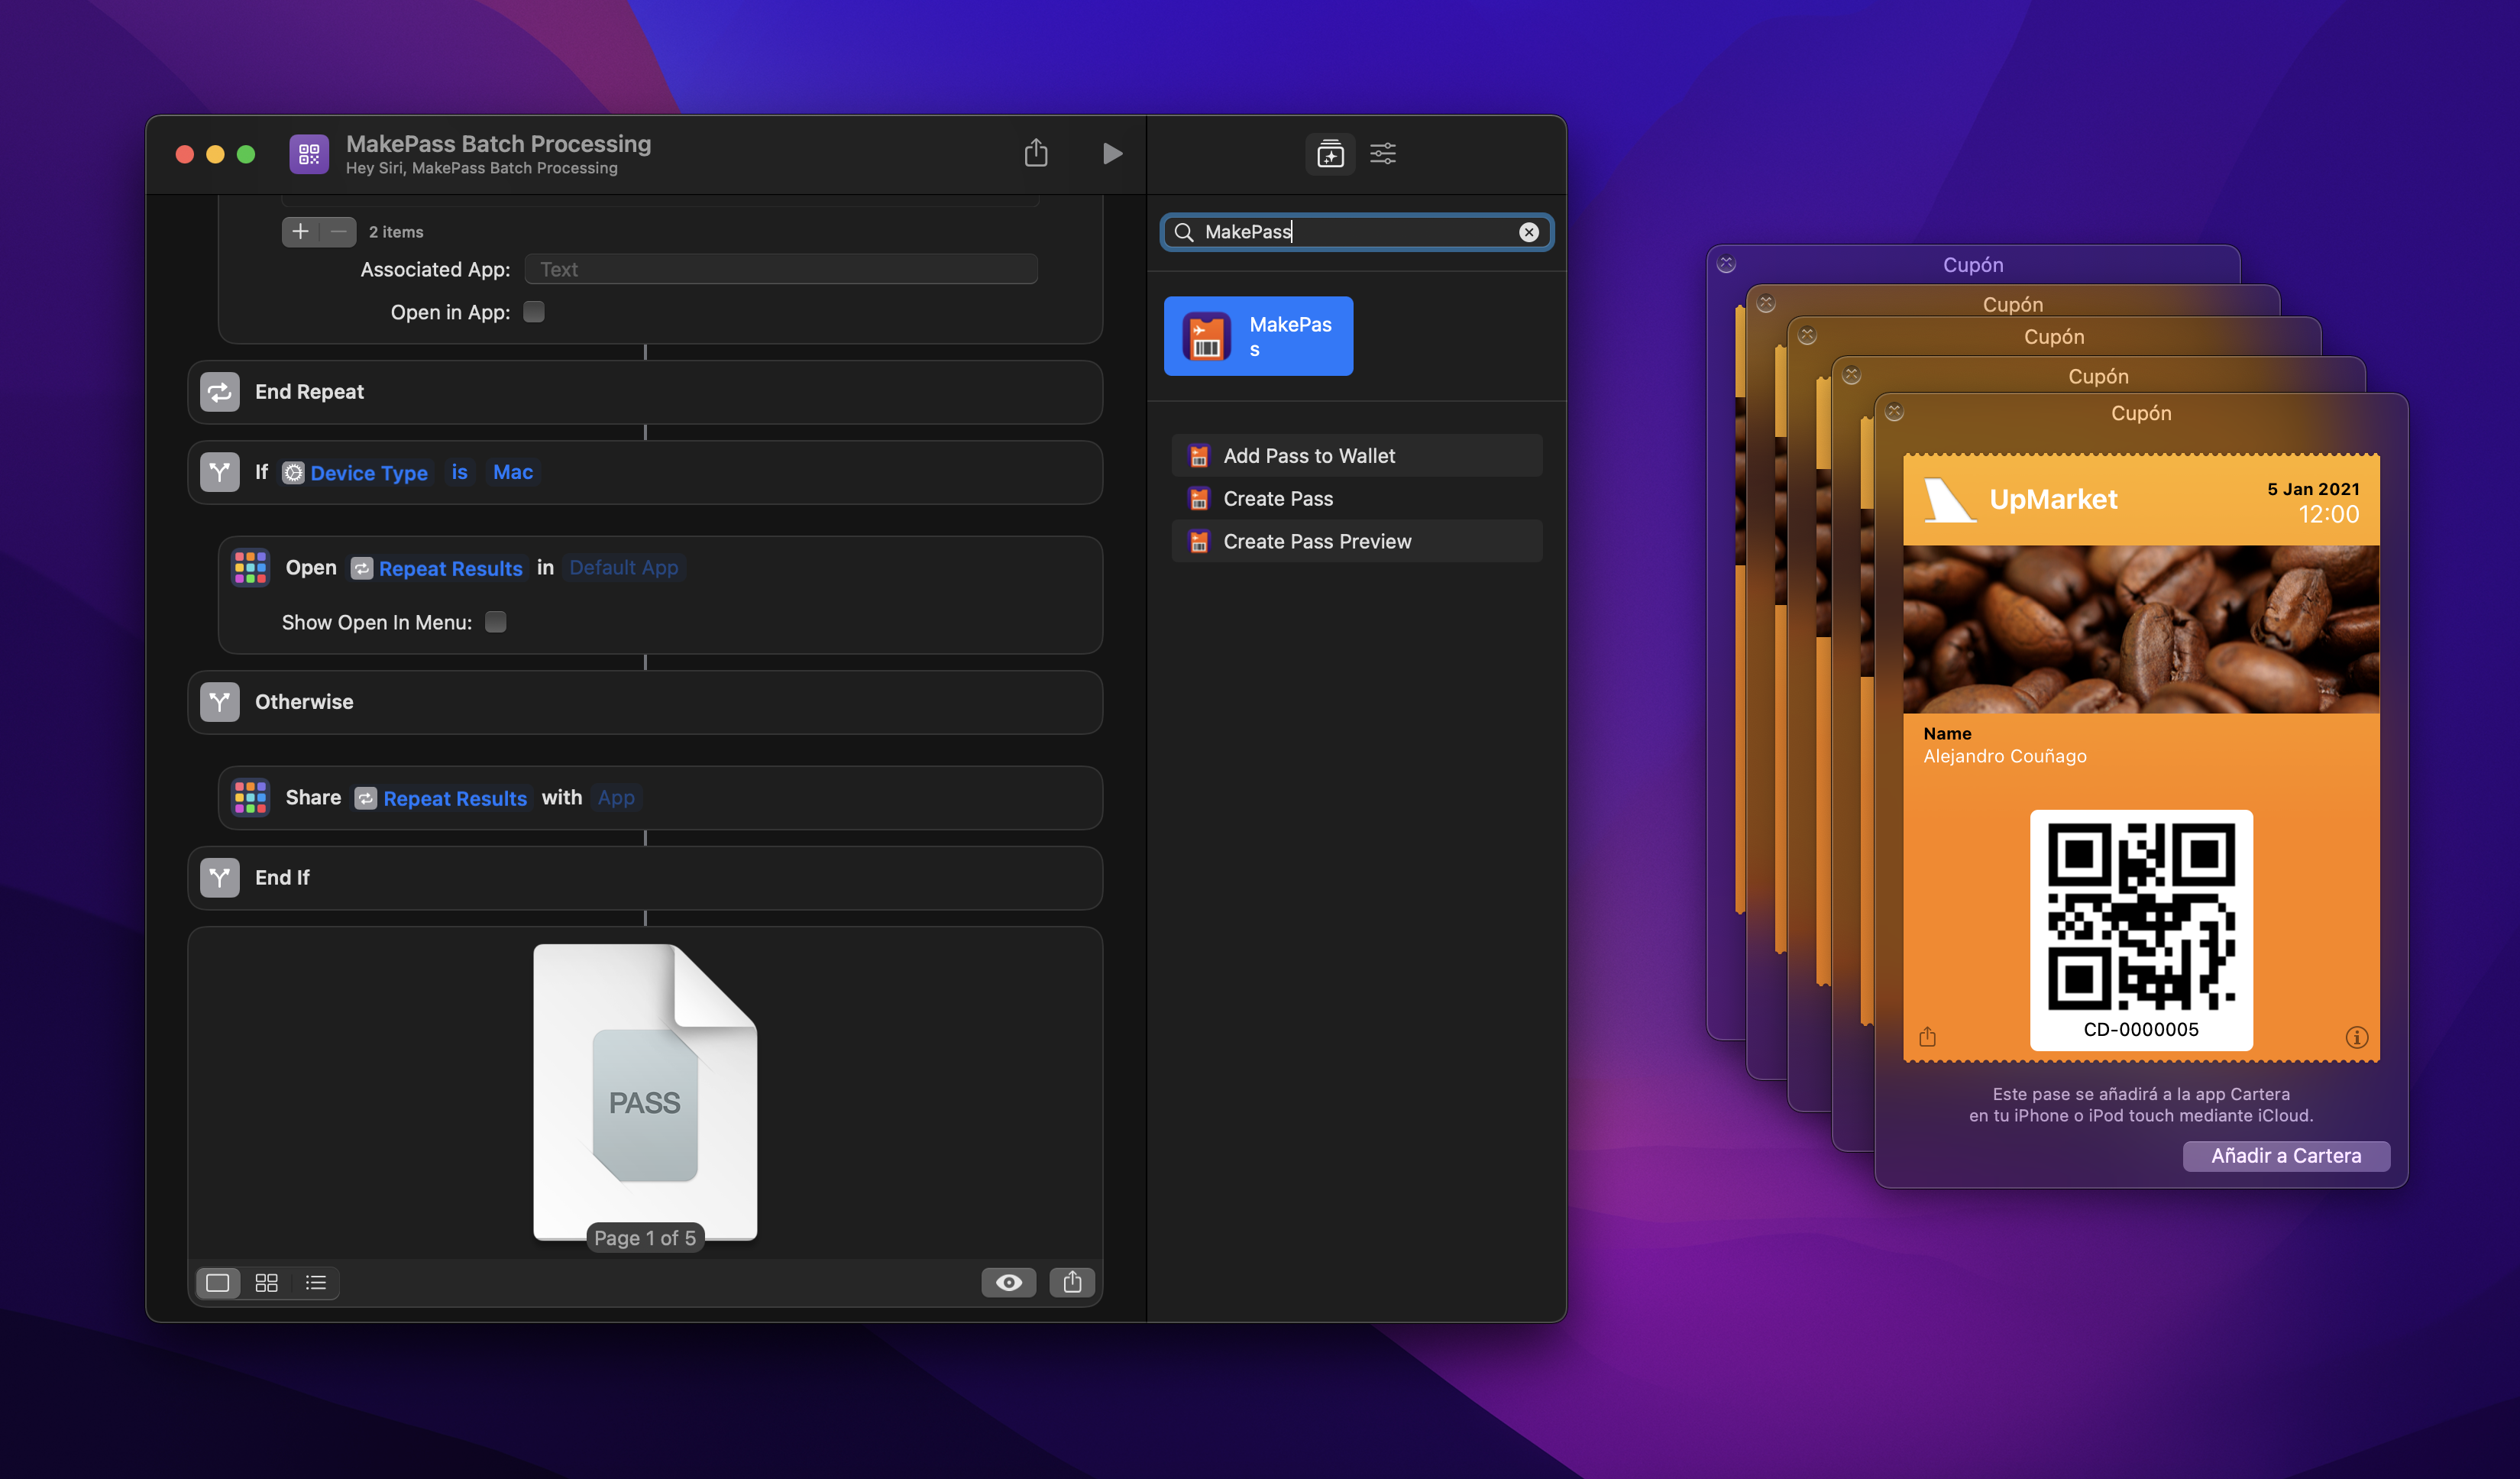
And voilà!, running the shortcut will generate 5 passes, each one with its own custom properties:

"MakePass – Batch Shortcut – 3"

To complete the shortcut, we can add an action to open the passes in macOS or share them with an app in iOS and iPadOS. You can also use the Save File action to store the pass files in your device.

"MakePass – Batch Shortcut – 4"

Shortcut

You can get the complete shortcut here.

Install Any iOS App on Apple Silicon Macs

EN

iOS apps on Apple silicon Mac

Apple silicon Mac running multiple iOS apps, some of them not available on the Mac App Store yet.

Apple silicon Macs can run iPhone and iPad apps natively using the same Mac Catalyst technology that powers apps like Twitter or Darkroom on macOS. Although all iOS apps are by default directly available on the Mac App Store, developers can opt-out and make their apps unavailable. Unfortunately, some of the most popular apps like Instagram, Deliveroo or Netflix have been removed from the Mac App Store… but that does not mean they cannot run on macOS, they are simply hidden in the Mac App Store. If you have purchased or downloaded any app from the iOS App Store, you have the option to make a backup of it using an IPA file, and those files can be used on Apple silicon Macs to install any iOS app.

Currently there are multiple approaches to download those IPA files for any iOS app:

Once you have the IPA file, you can simply double click it on any Apple silicon Mac and voilà!

HomeKit Automation: Extracting HomeKit Pairing Keys from macOS

EN

"HomeKit Pairing Keys"

Introduction

While the Home app allows you to read and control your HomeKit-based devices on macOS, iPadOS and iOS, sometimes you want more control. You may want to bridge some sensor to other protocol, expose you home temperature on a public API, or simply export the historical data to a CSV file. Either way, currently the HomeKit framework is private API on macOS, and it is not available on other platforms like Linux or Windows.

Fortunately there are some cross-platform implementations of the HomeKit Accessory Protocol that support controller-mode functionality:

In particular HomeKit Python supports reading and writing HomeKit characteristics on paired devices as well as generating additional pairings. The main problem is that typically HomeKit devices only support one main pairing controller, thus, once it is paired with the Apple Home app it can only be controlled with the pairing keys managed by the homed system daemon which are gated by the HomeKit framework.

Fortunately, the HomeKit pairing keys are stored on the iCloud Keychain. Unfortunately (but reasonably), the system tries hard to hide these pairing keys. In particular, they do not appear on the Keychain app nor can be read with the Security framework SecItem* family of APIs without some private entitlements granting access to the keychain access group com.apple.hap.pairing.

Process

First of all, we have to subvert the AMFI security model to be able to sign arbitrary executables with private entitlements. To do it, we have to disable System Integrity Protection and AMFI. Rebooting on Recovery OS we can disable the protections using the Terminal app:

$ csrutil disable
$ nvram boot-args=amfi_get_out_of_my_way=0x1
$ reboot

After reboot, we can use KeychainTool to dump the HomeKit keychain items.

$ git clone https://github.com/pvieito/KeychainKit.git
$ cd KeychainKit
$ cat KeychainTool/KeychainTool.entitlements
# The all-powerful * `keychain-access-groups` entitlement which grants its bearer permission to read all keychain items:
<?xml version="1.0" encoding="UTF-8"?>
<!DOCTYPE plist PUBLIC "-//Apple//DTD PLIST 1.0//EN" "http://www.apple.com/DTDs/PropertyList-1.0.dtd">
<plist version="1.0">
<dict>
    <key>keychain-access-groups</key>
    <array>
        <string>*</string>
    </array>
</dict>
</plist>

Now we will compile and run KeychainTool to dump all the keychain entries in the com.apple.hap.pairing access group.

Bear in mind that KeychainTool uses CodeSignKit to self sign its executable with private entitlements before relaunching itself. If a codesign error is shown set the CODESIGNKIT_DEFAULT_IDENTITY environment variable to the name of your Apple Developer certificate as presented on the Keychain app.

$ swift run KeychainTool -g com.apple.hap.pairing
[*] HomeKit Pairing Identity (com.apple.hap.pairing)
[ ] Account: 7C73D188-BF12-4B8C-B7A5-5842D71C24EA
[ ] Key: “21159cfa6032438be197d668b3562e262441965789f95634d6460d4cce5cc706+d2ed8558b369b4ee1fbf4f9eb8d687ee2799aba5608efc2712d8175697bd8ad8”
[*] Paired HomeKit Accessory: CC:0D:07:E4:F7:54 (com.apple.hap.pairing)
[ ] Account: CC:0D:07:E4:F7:54
[ ] Key: “3a4473f1efe5e378fdd329826936f34b674fcb97c8aa5bd9818abde46963f864”
[*] Paired HomeKit Accessory: 58:CA:96:CE:66:5F (com.apple.hap.pairing)
[ ] Account: 58:CA:96:CE:66:5F
[ ] Key: “44d34407d583aee3b12b774a6eb15ee96c527fa83af1db66ac90f60494bbbc29”

Voilà! Here we have all we need:

  • The HomeKit Pairing Identity entry contains the pairing identifier stored as the item account name: 7C73D188-BF12-4B8C-B7A5-5842D71C24EA and the LTP and LTS keys required by the HomeKit protocol separated by a + sign on the entry key payload: 21159cfa6032438be197d668b3562e262441965789f95634d6460d4cce5cc706, d2ed8558b369b4ee1fbf4f9eb8d687ee2799aba5608efc2712d8175697bd8ad8
  • Each accessory has its own Paired HomeKit Accessory keychain entry containing its paring key. For example, the device 58:CA:96:CE:66:E9 has the LTP key 44d34407d583aee3b12b774a6eb15ee96c527fa83af1db66ac90f60494bbbc29.

Now we can use the pairing keys to set up HomeKit Python on any device and platform:

$ python3 -m pip install "homekit[IP]" --user
$ python3 -m homekit.discover
# `homekit_python` will list all HomeKit devices found on the network:
Name: Eve Extend XXXX._hap._tcp.local.
Url: http_impl://192.168.0.123:8080
Configuration number (c#): 5
Feature Flags (ff): Supports HAP Pairing (Flag: 1)
Device ID (id): 58:CA:96:CE:66:5F  # Same Device ID as in the keychain entry.
Model Name (md): Eve Extend XXXXXXXX
Protocol Version (pv): 1.1
State Number (s#): 1
Status Flags (sf): Accessory has been paired. (Flag: 0)
Category Identifier (ci): Bridge (Id: 2)
$ mkdir ~/.homekit_python
$ python3 -m homekit.init_controller_storage -f ~/.homekit_python/pairing.json
$ nano ~/.homekit_python/pairing.json
# Write the pairing credentials of each the device:
{
  "EveExtend": {
    "AccessoryPairingID": "58:CA:96:CE:66:E9",
    "AccessoryLTPK": "44d34407d583aee3b12b774a6eb15ee96c527fa83af1db66ac90f60494bbbc29",
    "iOSPairingId": "7C73D188-BF12-4B8C-B7A5-5842D71C24EA",
    "iOSDeviceLTSK": "d2ed8558b369b4ee1fbf4f9eb8d687ee2799aba5608efc2712d8175697bd8ad8",
    "iOSDeviceLTPK": "21159cfa6032438be197d668b3562e262441965789f95634d6460d4cce5cc706",
    "AccessoryIP": "192.168.0.123",
    "AccessoryPort": 8080,
    "Connection": "IP"
  }
}
$ python3 -m homekit.identify -f ~/.homekit_python/pairing.json -a EveExtend
# The HomeKit device should identify itself (for example blinking an LED).
$ python3 -m homekit.get_accessories -f ~/.homekit_python/pairing.json -a EveExtend
# Shows all the accesories exposed by the device.
$ python3 -m homekit.get_characteristic -f ~/.homekit_python/pairing.json -a EveExtend -c 3.38
# Shows the value of a given characteristic, for example the room relative humidity:
{
    "3.38": {
        "value": 54.4525146484375
    }
}

Finally, remember to re-enable System Integrity Protection and reboot your Mac:

$ csrutil clear

Jailbreaking macOS: Patching AMFI to Allow Arbitrary Entitlements

EN

"Patching amfid"

Introduction

Entitlements are an important part of Apple Security architecture. They allow Apple to limit an OS feature to be only available to Apple-approved processes. Nowadays, even with System Integrity Protection disabled, the AMFI Kernel Extension and amfid process dueto will always kill any process at execution with restricted Entitlements not signed by Apple or with a properly Apple-approved embedded provisioning profile.

Unrestricted Entitlements are available to all signed binaries, even ad-hoc (some examples of this are the Sandbox entitlements com.apple.security.* or the application identifier one com.apple.application-identifier) but they do no give any special capability to the process, on the contrary, they limit its reach.

To allow any Entitlements, even the more interesting Restricted ones, for a Developer ID signed binary we have to modificate the amfid process (to allow adhoc signatures too we would have to patch the AMFI Kernel Extension or its underlying dependencies which I didn’t try).

Process

To patch a system daemon, we have to disable macOS System Integrity Protection. After some reverse engineering, it seems one of the main decisions in the amfid flow is in the address offset 0x347D.

"Patching amfid"

Decision flow of amfid.

Knowing that we can change the following two instructions from:

test %r14, %r14
je loc_100003531

To this:

mov %r14, %r15
jno loc_100003531

This way the flow will always jump to loc_100003531 and %r14 will become null (%r15 is always null in this point), so every Developer ID signed process will be validated even without a provisioning profile allowing its Entitlements.

Code

To achieve this modification we can go the hard way by modifing the binary in situ (it is located at /usr/libexec/amfid) or the soft way: patching amfid memory at runtime. I preferred the second option so I could restart the unpatched amfid code by simply killing it.

To do it I ported to Python 3 a wrapper for Mach VM APIs called pymach and added a new function to get the ASRL Slice Offset of the process: PyMach for Python 3. With that I wrote this script for macOS 10.12.2. To use it simply run:

$ sudo ./amfid_patch.py

And answer yes when asked if you want to patch the process. Voilà! Now any Developer ID signed binaries will be executed even with restricted Entitlements.

You can set any Entitlement you want, like com.apple.developer.icloud-container-identifiers or com.apple.private.appleaccount.app-hidden-from-icloud-settings with an arbitrary iCloud container. For a complete list of private Entitlements used by Apple you can go to Jonathan Levin’s Entitlements Database.

References